The only real difference between adding a file to your
Digital Dropbox and adding a file to your Group File Exchange is that, in the Group File Exchange, there's no space for a description.
To add a file to the Group File Exchange, first type a sufficiently descriptive title in the Title: field, then click the Browse... button.

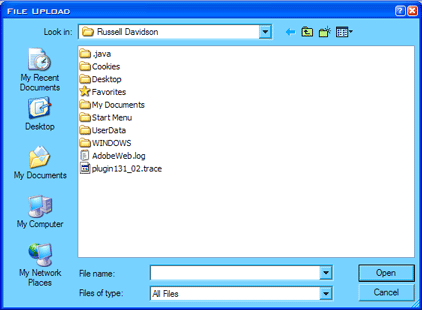
Clicking the browse button will open a File Upload window, the appearance of which will vary, depending on your operating system (Windows XP shown below). To upload a file to your Group File Exchange, locate it in this window, click it once to select it, then click Open.
NOTE: If your web browser is a 4.x or earlier version of Netscape, you will need to set the File Upload window to display All Files (by default it displays only html files). To do this, locate the Files of type: field (near the bottom of the File Upload window), then click the down arrow ( ) to the right side of this blank. Select All Files from the pulldown list.

Once you have clicked the Open button, the File Upload window will close.
To complete the file upload process, proceed to step 2.

Click the  button to upload your file, or
  if you have changed your mind.
When you click Submit, a pop-up window will warn you that you are Adding a file, not Sending a file. This is to be expected. Click OK to continue, and you will be taken to a Success! page, letting you know you have successfully uploaded your file to the Group File Exchange.


