Dental library (restricted access)
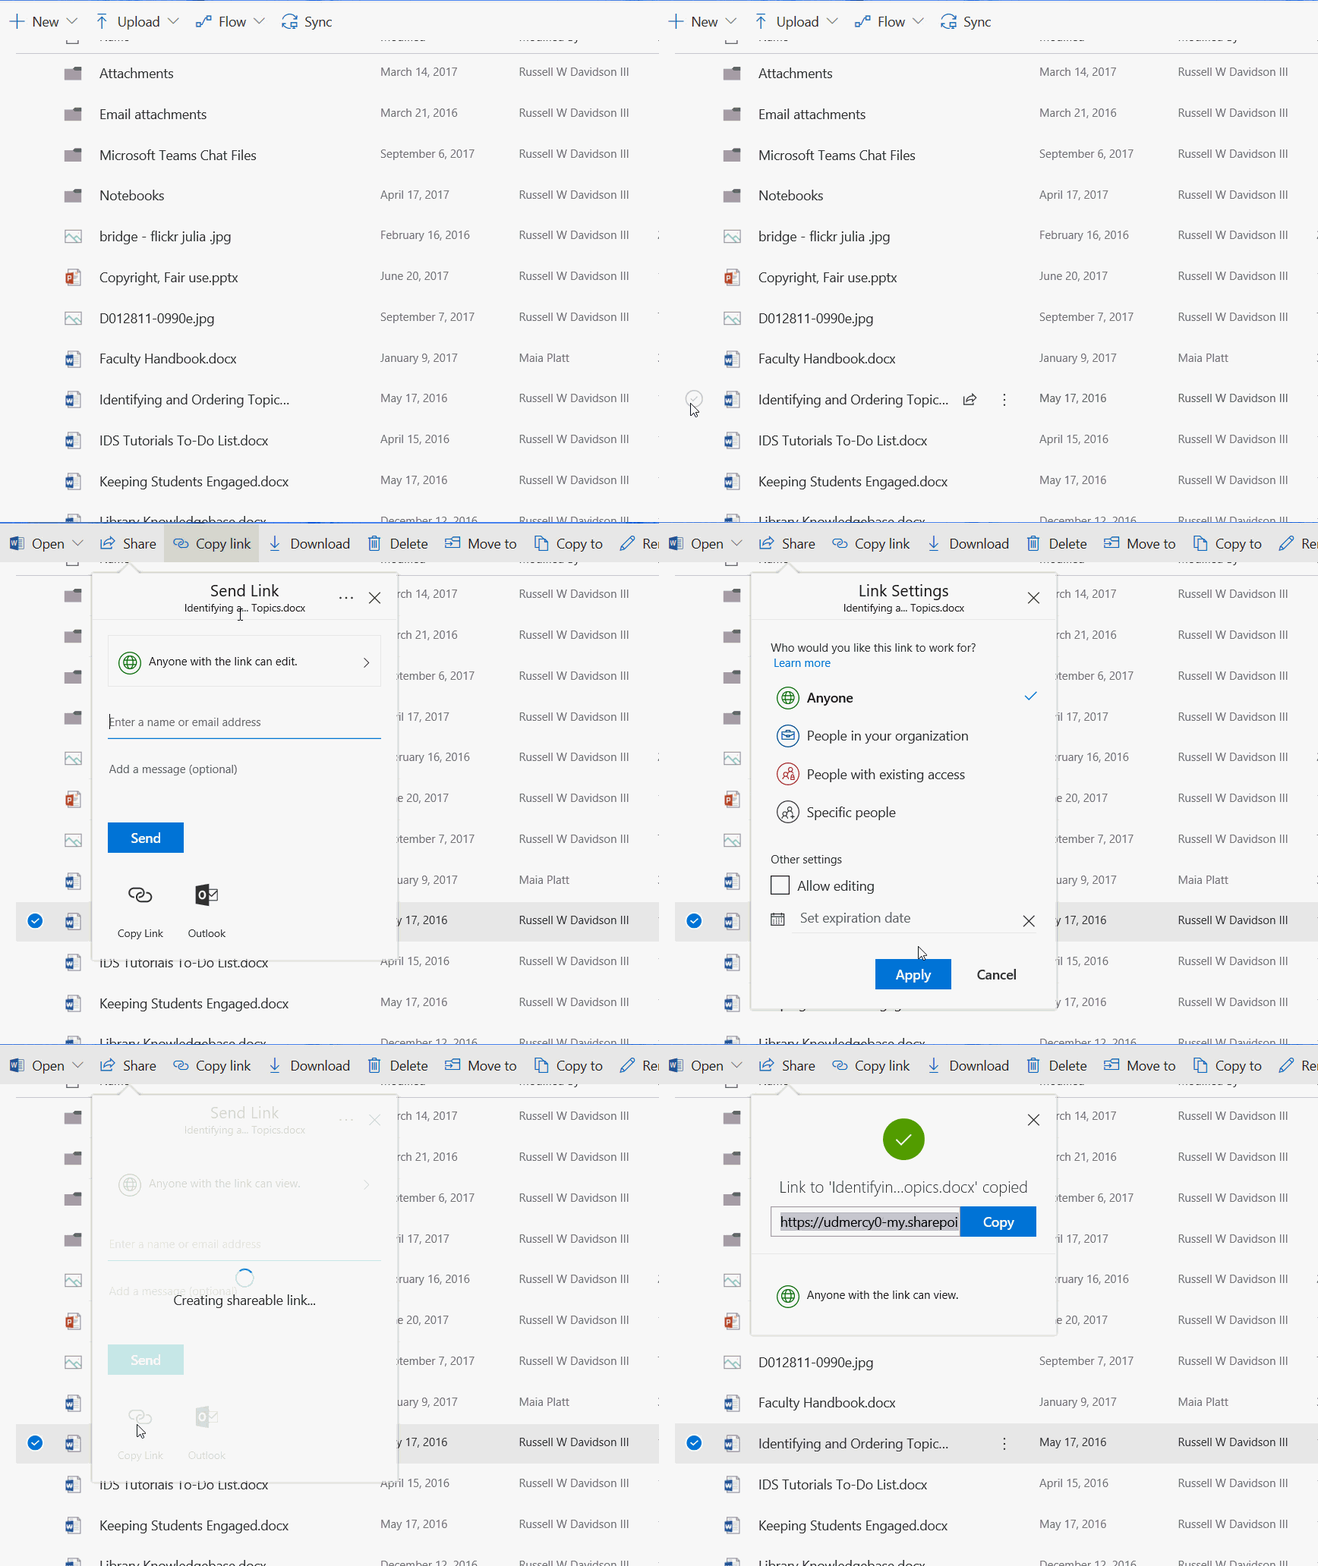
It's easy to share files you've created or saved to OneDrive. Simply, select a file from youru OneDrive file list by clicking the circular checkbox to the left of the file name. Then click the SHARE button at the top of the list to get the file sharing options.

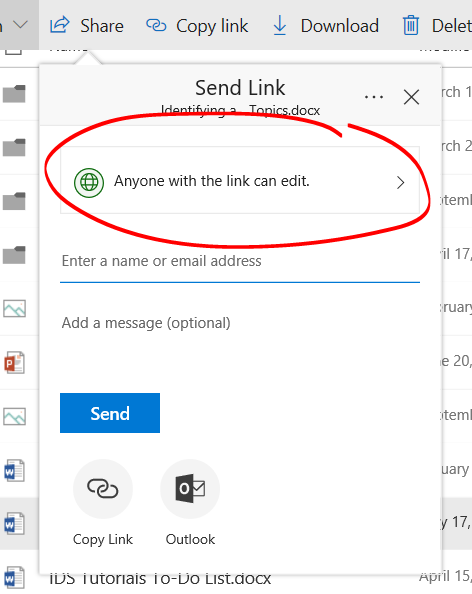
Under SHARE, you'll want to adjust the link settings before generating the link. Click "Anyone with the link can edit" to see these settings.

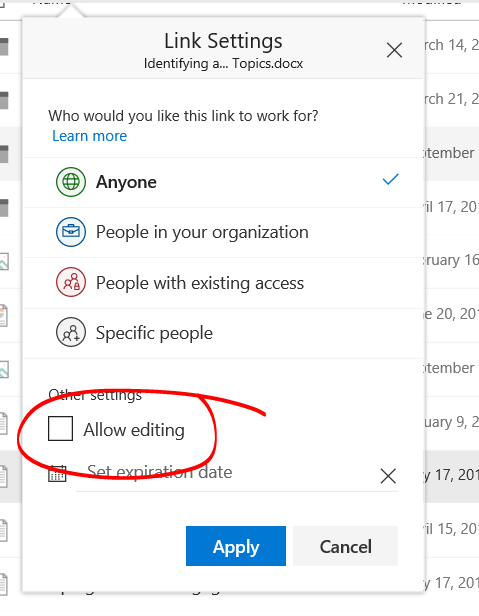
Leave the ANYONE option selected to let anyone who has the link view the file. If you'd like to limit access to folks with Detroit Mercy Office 365 accounts, select "PEOPLE IN YOUR ORGANIZATION". With this option selected, anyone who clicks the link will be required to log in using their Office 365 user name and password before viewing the file.
To prevent the folks you're sharing the file with from editing the file, uncheck the ALLOW EDITING box at the bottom of the Link , uncheck the Allow Editing bottom at the bottom.
You can also use the SET AN EXPIRATION DATE option to set a date after which the link will no longer work.

Once you have the settings as you want them, click the APPLY button.
Click the COPY LINK button to generate the link, then click COPY to copy the link to your computer's clipboard. You've now got a link you can share anywhere.
Add this link to an item in Blackboard
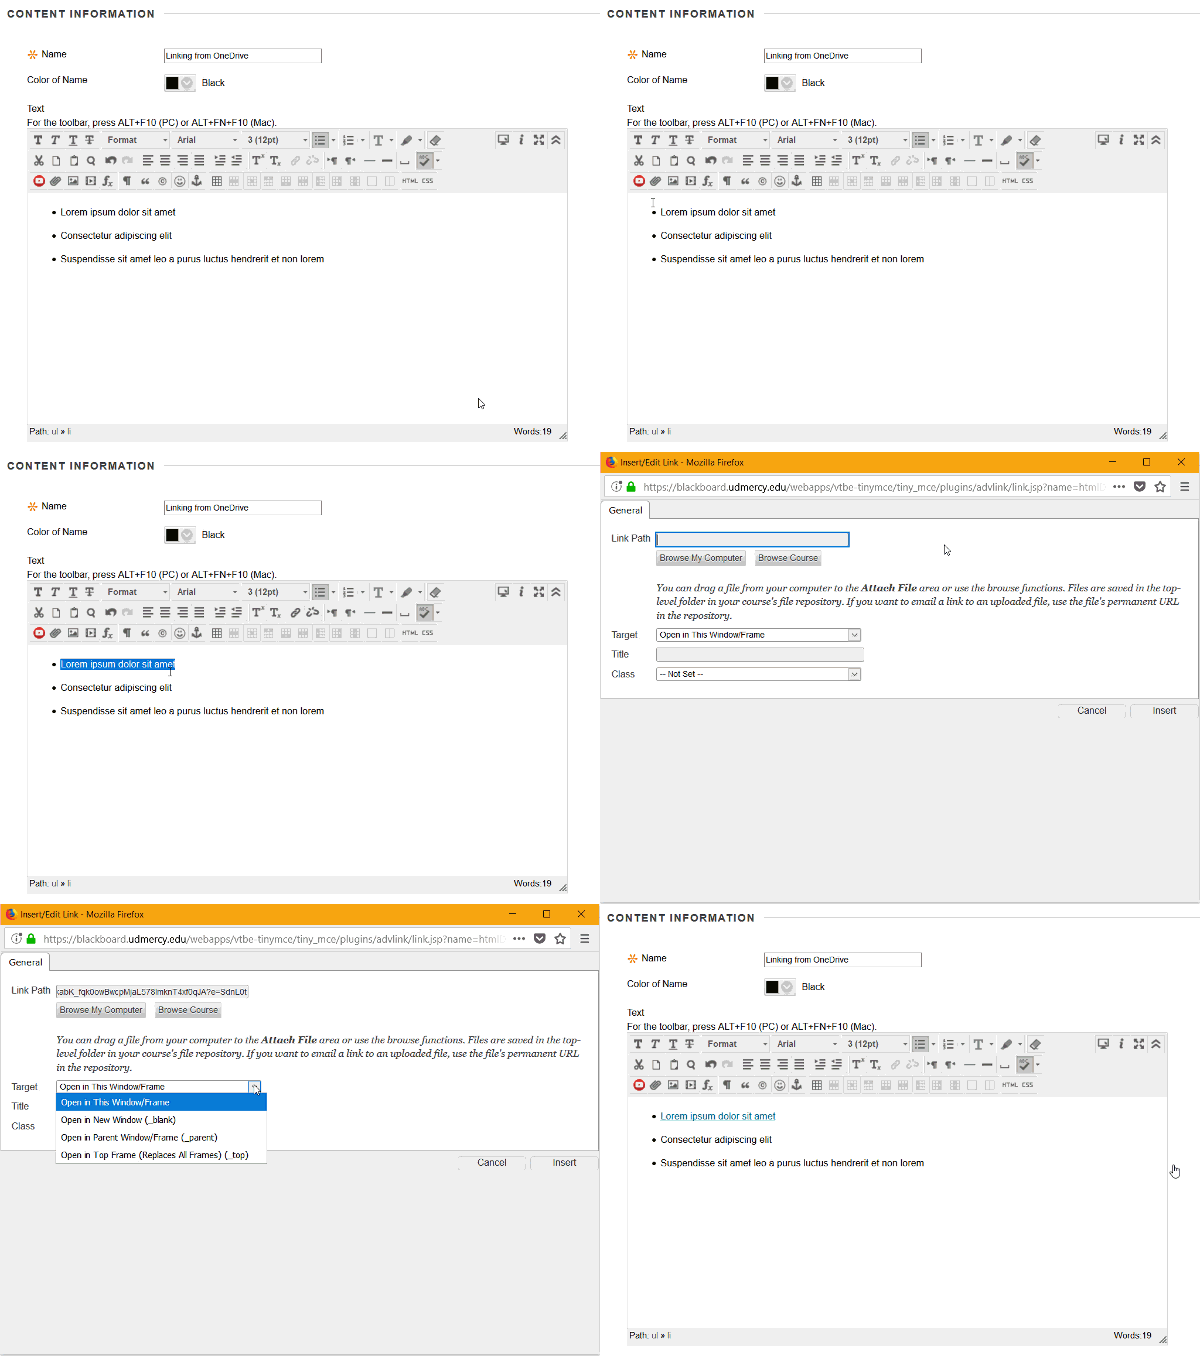
To add this link to a Blackboard item, just paste this link into any space in Blackboard that takes a web link. For example, inside an ITEM, you can highlight some text you've writtenm, then click the LINK button in the text box toolbar. Paste the link into the link space (we recommend choosing "New window (_blank)" on the target line. Then click INSERT to add the link.


