Students & Faculty
Grading Periods are an efficient way of managing your Grade Center so you only see certain groups of columns at one time. This can be particularly useful when trying to manage a very large Grade Center. As the name suggests, Grading Periods are primarily geared toward clustering columns chronologically. You might use Grading Periods to separate items graded before and after the midterm, or you might use a grading period to collect all the columns associated with module 1 in the course, then another for module 2, and so on. Faculty interested in more sophisticated view management (narrowing to particular categories, users, performance criteria and more) should check out check out Smart Views instead.
To create a Grading Period, go to your course’s Grade Center, point to MANAGE and choose GRADING PERIODS.
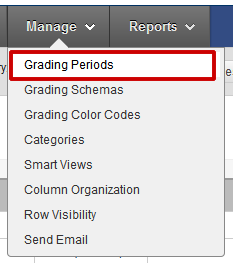
To create a new Grading Period, click the CREATE GRADING PERIOD button at the top of the page.

On the CREATE GRADING PERIOD page, you’ll need to enter a name for your new Grading Period. Any name will do. You can provide a brief description for the Grading Period if you’d like but this will only be available from inside the course’s Grade Center, making it useful if you plan to share your course site with other faculty or if you think you might need your memory refreshed when revisiting this course in a future term.
There are two types of Grading Periods: those that are applied manually and those that are based on the due dates applied to Grade Center columns. If you’ve been using due dates on your columns, applying your new Grading Period by date may be the easiest way to go. To apply this Grading Period to a date range, choose RANGE under the DATES heading, enter start and end dates, then check the ASSOCIATE COLUMNS box to apply the period to all columns that have due dates in this range.
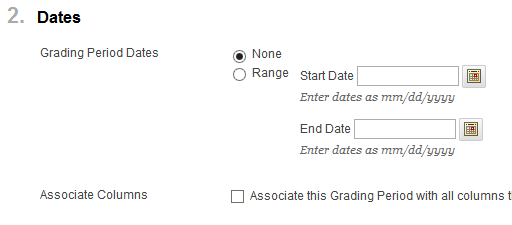
Click SUBMIT at the top or bottom of the page to finish creating your Grading Period.
Applying a Grading Period
We can apply our new Grading Period to Grade Center columns by going back to the Grade Center proper, pointing to MANAGE and choosing COLUMN ORGANIZATION.
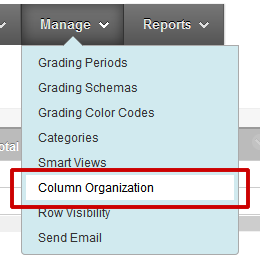
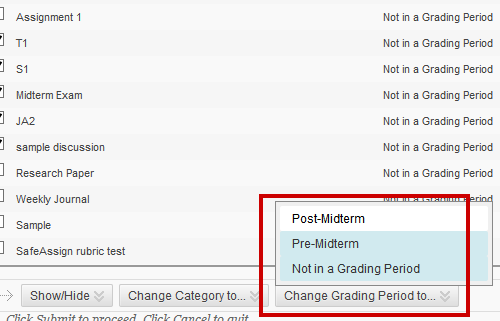
Now select the columns you want to move into a Grading Period by clicking the checkbox to the left of the column name …
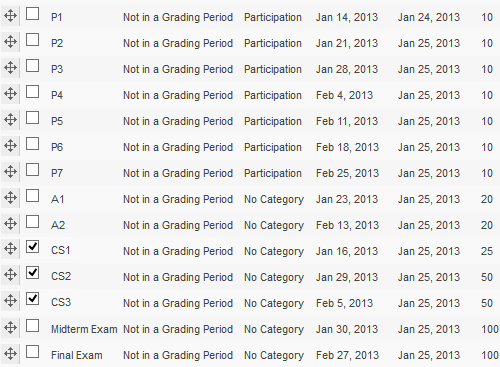
… then point to the CHANGE GRADING PERIOD TO button at the top or bottom of the page and choose the Grading Period you wish to apply.
Viewing a grading period
To view your grading period, you’ll need to return to the Grade Center proper. First, we need to turn on the FILTER menu. So from the Grade Center, click the FILTER button in the upper right …

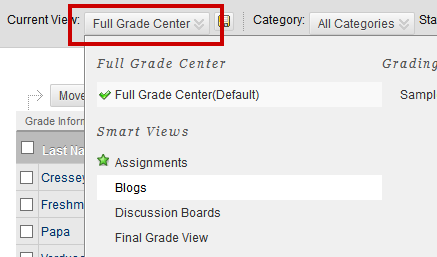
This will add a filtering menu right beneath this line of buttons. Point to the button to labelled CURRENT VIEW (likely, this will say FULL GRADE CENTER) to access a broad menu of filtering options. Select the Grading Period you want to use, and your view will instantly be filtered.
Permalink Last updated 08/03/2017 by R. Davidson


