Posting a video to Stream serves a couple of functions. First, it makes it easier for your peers to see the video -- Stream, like YouTube, optimizes a large, high quality video for delivery over the web. A Stream Group lets us limit who can see the video to just the folks in your class, so you don't need to share a video with the whole University or the world just to let your professors and peers see it.
To add a video to Stream, you'll need to find your group, upload the video, then publish it and share a link with your professor or the class.
Find your Group
To add a video to a group on Stream, you'll want to start out on the group page.
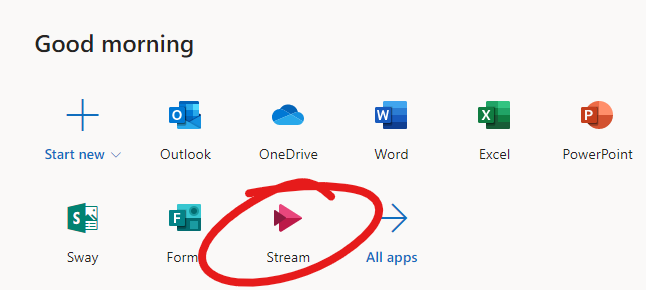
Your instructor will probably provide you with a link to the group for submission. If not, log into Office 365 (where you go to check your email -- http://portal.office.com) then select STREAM from the apps list. If Stream doesn't appear immediately, click the ALL APPS button.
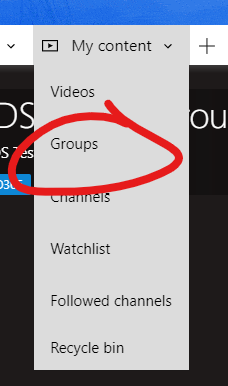
In Stream, click MY CONTENT then select GROUPS.
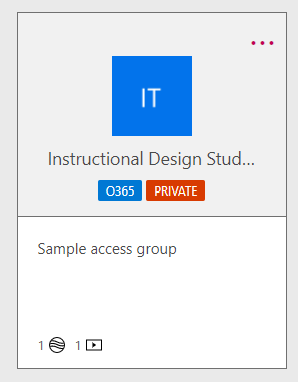
Choose your group from the list.
Posting a video to Stream serves a couple of functions. First, it makes it easier for your peers to see the video -- Stream, like YouTube, optimizes a large, high quality video for delivery over the web. A Stream Group lets us limit who can see the video to just the folks in your class, so you don't need to share a video with the whole University or the world just to let your professors and peers see it.
To add a video to Stream, you'll need to find your group, upload the video, then publish it and share a link with your professor or the class.
Find your Group
To add a video to a group on Stream, you'll want to start out on the group page.
Your instructor will probably provide you with a link to the group for submission. If not, log into Office 365 (where you go to check your email -- http://portal.office.com) then select STREAM from the apps list. If Stream doesn't appear immediately, click the ALL APPS button.

In Stream, click MY CONTENT then select GROUPS.

Choose your group from the list.
Upload Your Video
Click UPLOAD VIDEO button.

You can then browse for the video you need to upload on your computer.
Depending on the size of the video, the upload may take a while. Be patient. If it gets stuck for a long time at a single percentage, you may need to cancel the upload and try again.
Fortunately, you can complete the next few steps while the video is uploading.
Publish and Share
To make the video available to your class and / or professor, you'll need to Publish the video, then provide a link.
While the video is uploading, you'll have a box onscreen with some options. Click the PUBLISH NOW button at the bottom to make the video visible (once it's finished uploading).
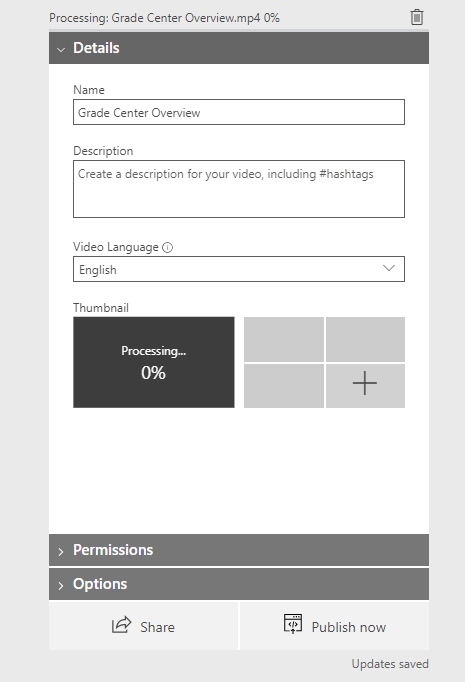
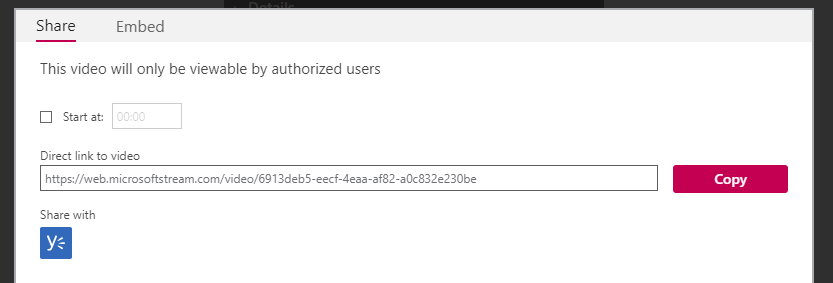
To share your link, click the SHARE button (also at the bottom of that panel).
This will open a SHARE window with a long url in it. Copy that URL.
Then navigate to the section of your course where you should be sharing the video. If the video is still uploading, you'll want to do this in a new tab or window.
Add that link to the appropriate content area.


