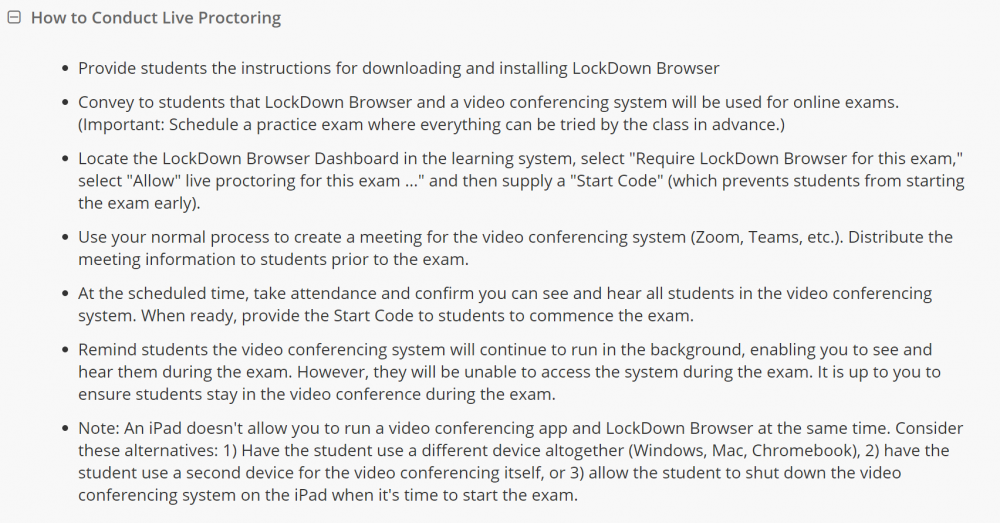
LockDown Browser is a web browser (an application like Safari, Edge, Firefox, and Chrome) specifically geared toward taking online tests. While LockDown Browser is running, students are unable to use their computers for anything other than taking the test.
Enabling LockDown Browser prevents students from looking up answers or taking screenshots on a single computer but does not prevent them from using other nearby computers, using their phones, or collaborating with other people in the room. This is where Respondus Monitor can be useful.
Respondus Monitor enables the webcam on students’ devices for the duration of their test attempt. A recording is stored in Blackboard with highlights indicating problems such as a student’s face not being clearly visible to the camera.
If you plan to use Monitor, you should include the following information, along with the a note indicating students will need to have a webcam, in your course syllabus.
There is no additional fee for using Monitor.
Respondus LockDown Browser uses a standard Windows or Mac installer that can be downloaded from the following link: http://www.respondus.com/lockdown/download.php?id=945835138 (note: this link is unique to Detroit Mercy)
LockDown Browser for Chromebook and iPad is available from your device app store.
LockDown Browser is already available on computers in the Libraries and Detroit Mercy computer labs.
How To Set Up Monitor
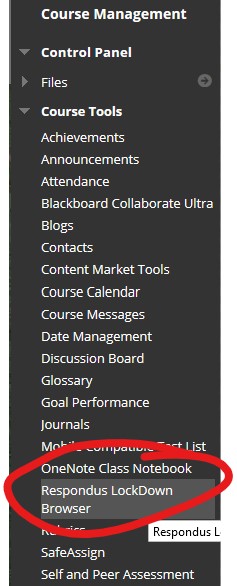
Monitor is an addition to LockDown Browser, so first you'll need to set that up. After you've added your test to the course and set all the availability parameters, go to RESPONDUS LOCKDOWN BROWSER under TOOLS in your course menu.
If this is your first time opening Respondus LockDown Browser dashboard, you will see a LockDown Browser Resources screen. Click CONTINUE TO LOCKDOWN BROWSER to close the help screen. If you don't want to see it again, check the "Don't show this page again" box in the lower-left corner.
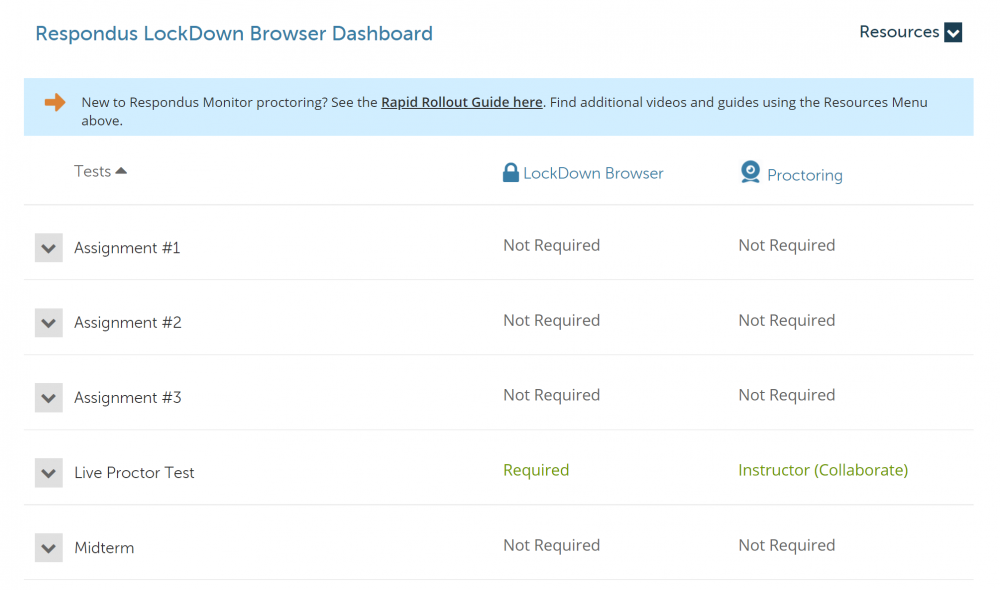
The dashboard consists of a table of the assessments deployed in your course with columns indicating if LockDown Browser and/or Respondus Monitor is enabled for each test. If Respondus Monitor is enabled, it will also show the selected meeting room type.
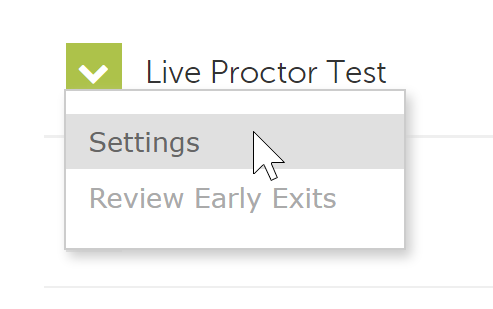
To add or remove LockDown Browser or Respondus Monitor, click the grey box with a down-arrow in it that appears next to the name of a test and choose SETTINGS.
To enable any LockDown Browser features, you must first tick the box next to REQUIRE RESPONDUS LOCKDOWN BROWSER FOR THIS EXAM. This will enable the Advanced Settings and Respondus Monitor options.
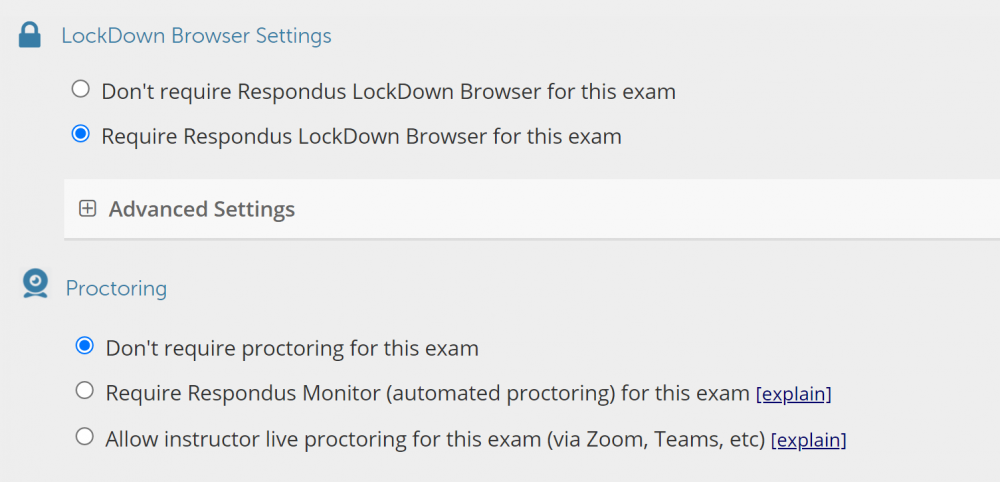
The ADVANCED SETTINGS contains options to allow your students to use the LockDown Browser iPad and Chromebook apps. Without these options checked, students will only be able to use Windows and Mac versions of LockDown Browser. You can also enable a calculator, allow printing, or whitelist certain web domains (for allowing access to ebooks during a test).

To enable proctoring, tick the box next to either REQUIRE RESPONDUS MONITOR (AUTOMATED PROCTORING) FOR THIS EXAM or ALLOW INSTRUCTOR LIVE PROCTORING FOR THIS EXAM. This selection will open a new set of options. Proceed to the correct section below.
RESPONDUS MONITOR (AUTOMATED PROCTORING)
The options for Respondus Monitor are related to the automatic sequence students are required to complete before starting the test. Each step has a preview button that lets you see how the student will experience the step, and in some cases you can edit the default text they'll see onscreen.
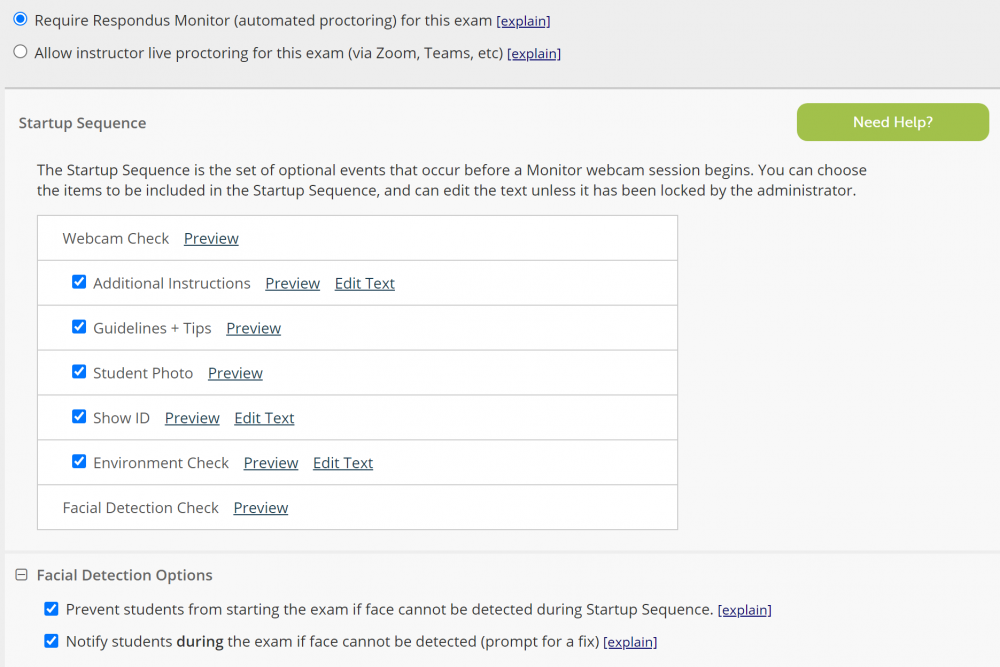
The two Facial Detection Options let you adjust how Monitor works for extreme edge cases -- letting students start a test when they're not on camera, or not notifying the students if they get out of the camera's view, for example. For the most part, you'll want to leave these options enabled.
Click SAVE+CLOSE to save your LockDown Browser and Monitor settings.
INSTRUCTOR LIVE PROCTORING FOR THIS EXAM
There are two key settings for Live Proctoring. First, which meeting application you want to use. Collaborate is the easiest since it's part of Blackboard, but Teams works well too. Zoom and Google Meet are supported by LockDown Browser, but ODE cannot provide support for them. We recommend using Collaborate.
The second setting is the Start Code. This password prevents students from starting the test until they have joined the meeting room and the proctor has provided them with the code. A start code is required to use Live Proctoring.
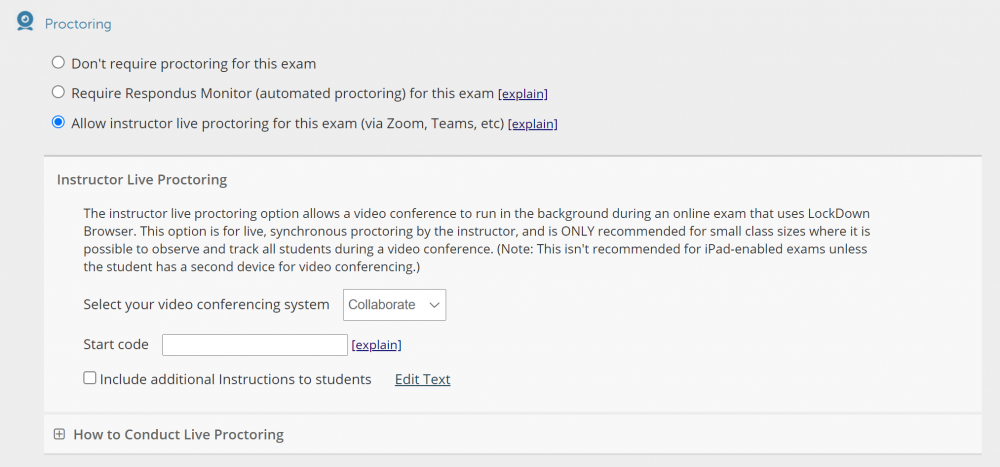
The last setting allows you to insert an extra message to students. "How To conduct Live Proctoring" provides the list of steps for a proctor to follow (shown below). Note that students using the iPad or Chromebook versions of LockDown Browser cannot participate in Live Proctoring unless they use a second device or exit the meeting room before starting the test.
Click SAVE+CLOSE to save your LockDown Browser and Monitor settings.
