Faculty
Microsoft Teams provides a set of collaboration and communication tools that can add a layer of immediacy and interactivity that some folks find even Blackboard Ultra to be lacking. Teams meetings can be used for video and screen-sharing chats that range scale from individual to groups to entire classes. A Teams post provides opportunites for threaded conversation between members, and Teams files and wikis can be an excellent center for easy collaboration and sharing between Team members.
To get started with all this interacting, you'll need to set up and populate a Team. When creating and adding folks to a Team, you'll also be creating and populating a Stream group, so you won't need to go through the enrollment process twice.
To get started, launch Teams, either in your browser or on your desktop -- there are slight differences between how the two behave, but the functionality is largely the same.
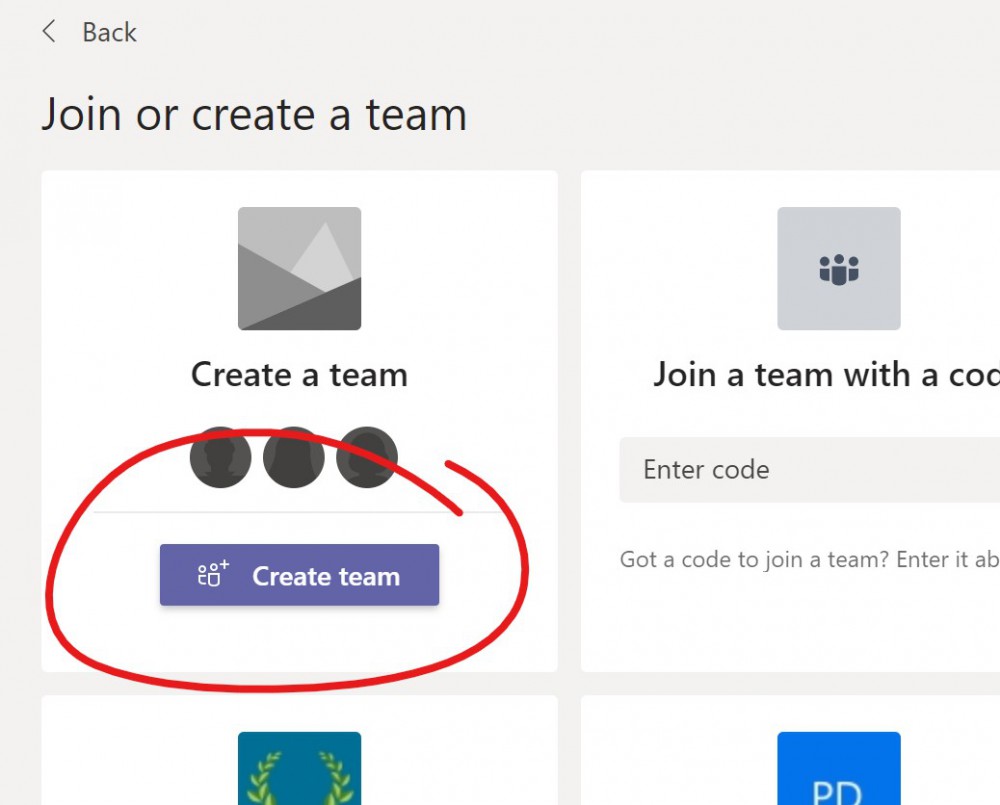
In Teams, click the JOIN OR CREATE TEAM button in the upper right.

Then put your pointer over the CREATE A TEAM block and click the CREATE A TEAM button that appears when that block is hovered.
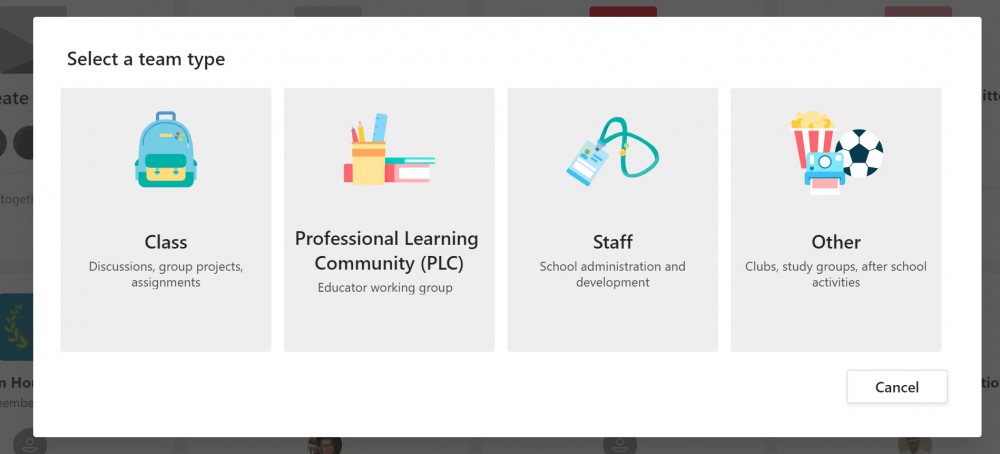
The team type options decide what tabs are in the Team by default, they don't impact basic functionality in any major way. The "Class" option contains a bunch of options -- quizzing via Forms, an Excel grades page, assignment submission through OneDrive -- that you might not be and could be confusing for students. Consider using PLC, Staff, or Other if you do not plan to use these features.
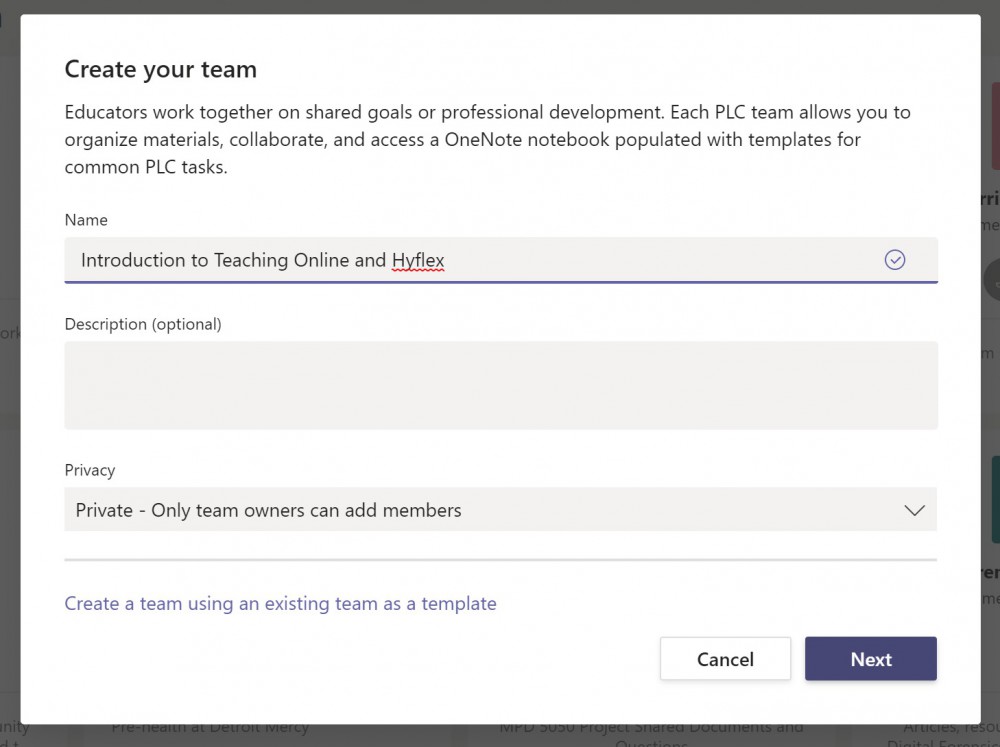
Next, we enter a NAME for our team, and possibly include some descriptive information. If you've already laid out a team with the tabs you want to re-use, use the button at the bottom to select that as a template.
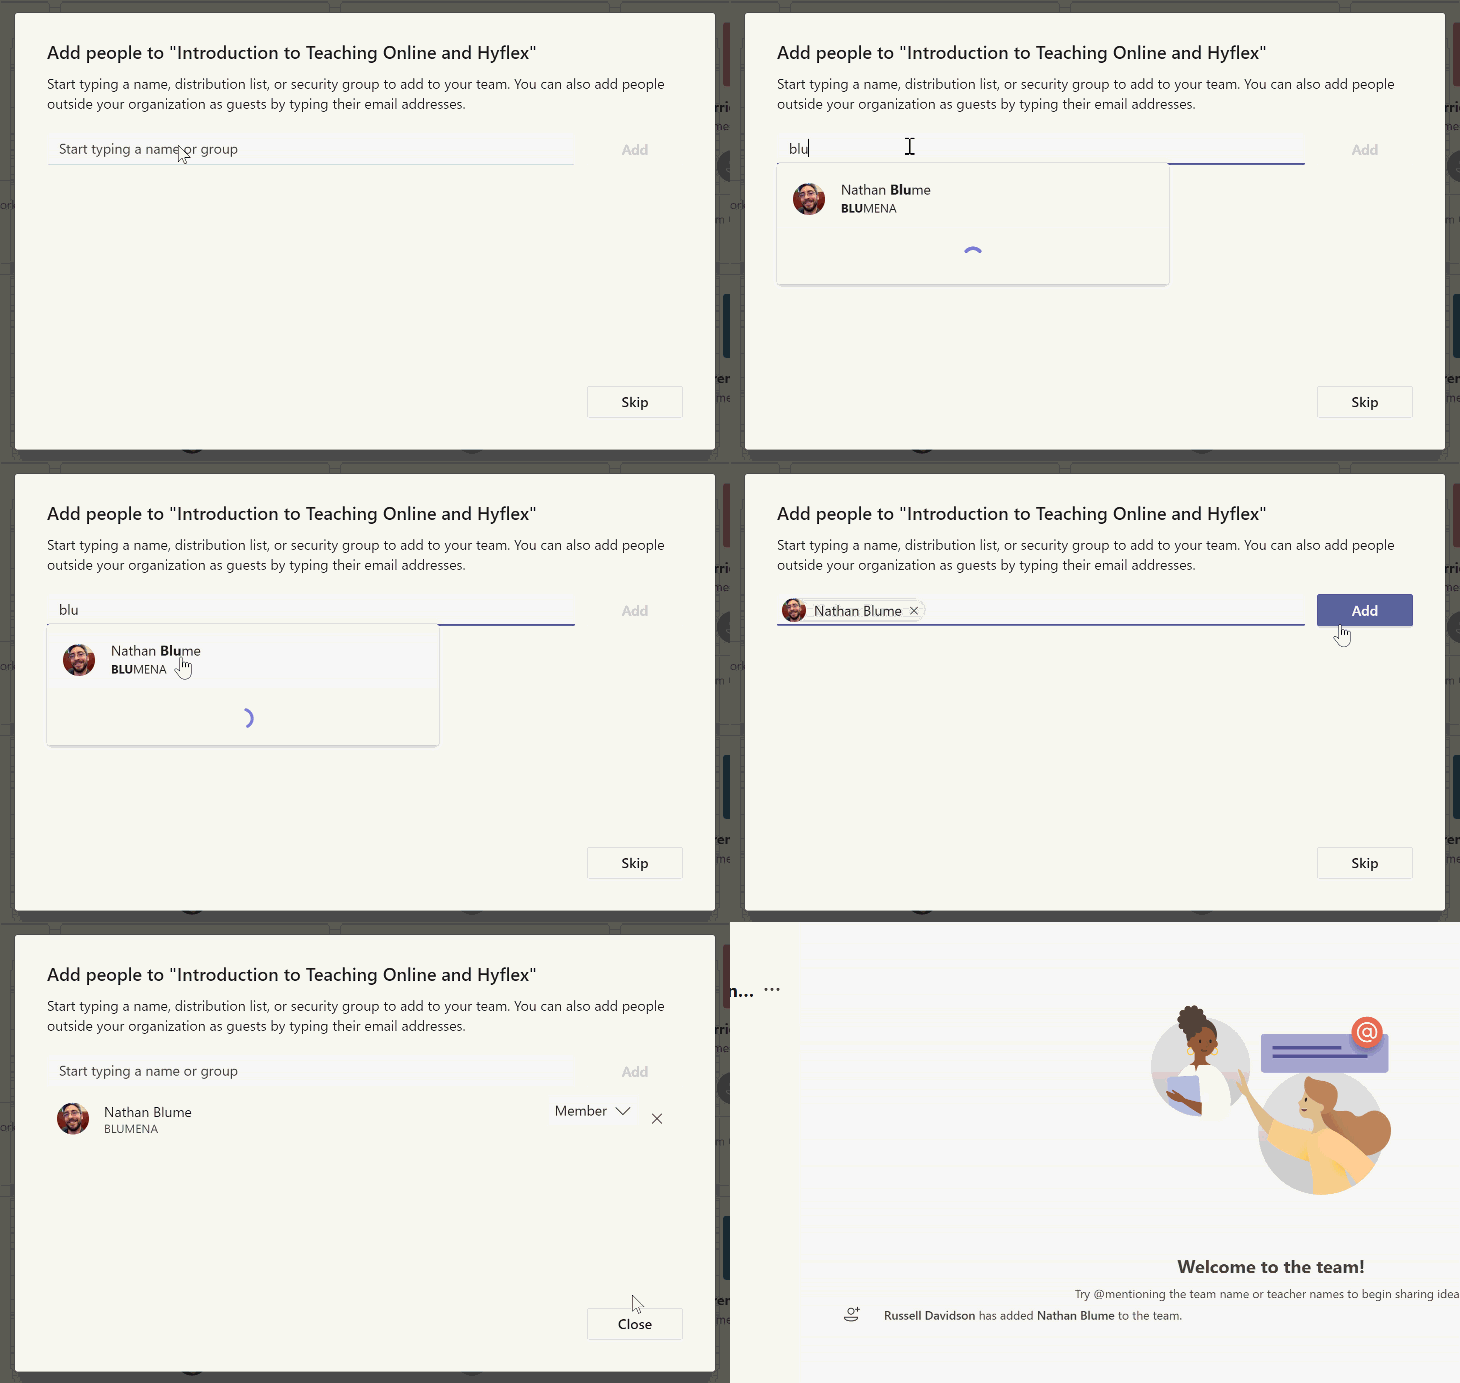
Now you'll want to populate your team. Search for students to add them to the list. Use the class roster in Blackboard or Banner to get your students' names and email addresses.
When a name pops up, select it to fill out the line, then click ADD to add them to the Team.
Click CLOSE when all members have been added.
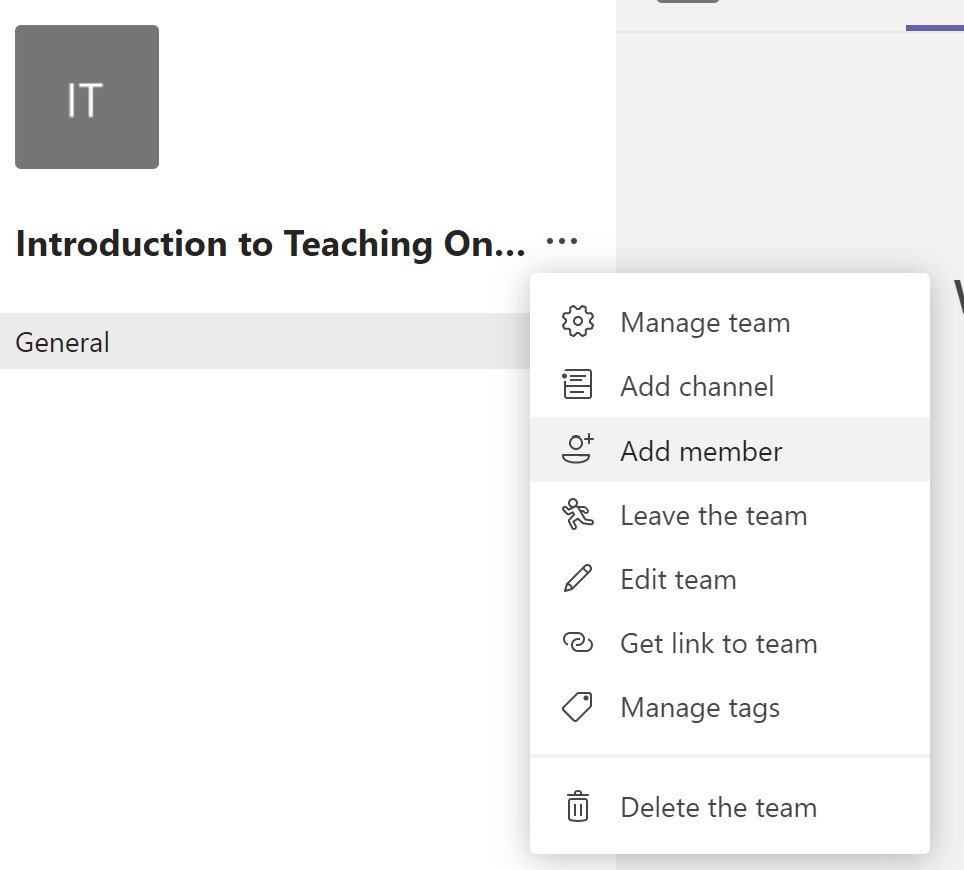
After the team has been created you can add more members by clicking the ellipsis button next to the team name and choosing ADD MEMBERS.
