Dental library (restricted access)
The assignment tool lets you collect work from your students for grading. Almost any file type can be collected via the assignment tool -- Word documents, PowerPoint presentations, audio files, video files. As the assignments are submitted, you can track, view, and grade student work via the Grade Center. Document-type files (files that are largely text) can be graded online from within the Grade Center.
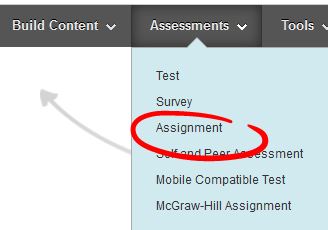
In this tutorial, we will walk through the process of creating an assignment in your Blackboard course. To start, first go into a content area where you wish to make an assignment available to your students. Mouse over the “Assessments” button toward the top of the body of the page and select “Assignment”.
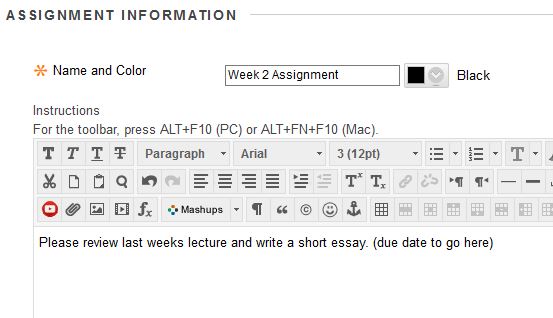
Next, type in the assignment name along with any instructions you may have for your students. Adding a due date into the set of instructions is encouraged, as it can help eliminate any confusion as to when an assignment is due.
If you have any files to attach for your students to review or work from -- worksheets, case studies, rubrics, etc -- you may add them by clicking on the “Browse My Computer” button. Or if you’ve already uploaded this information to the course, click “Browse Course” and find the file in your course's file library.

Next you have the option to add a due date. This due date will also be added to the students' Blackboard calendar (which students may import into the calendar system of their choice, such as the calendar on their phone).

Make sure to put in a point value for this assignment. This is a mandatory field. When scoring the assignment you'll be putting in a number value based on the maximum you enter here.

If you are using a rubric to grade your assignment, you may add it by clicking on the “Add Rubric” button. If you would like to learn how to utilize Rubrics in Blackboard, please check out this tutorial on Rubrics in Blackboard.
![]()
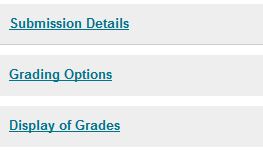
From here, there are additional options in the next 3 categories. You can view what’s in each category by clicking the title to expand the options. The default settings are generally appropriate, but you may wish to change some of them depending on your needs.
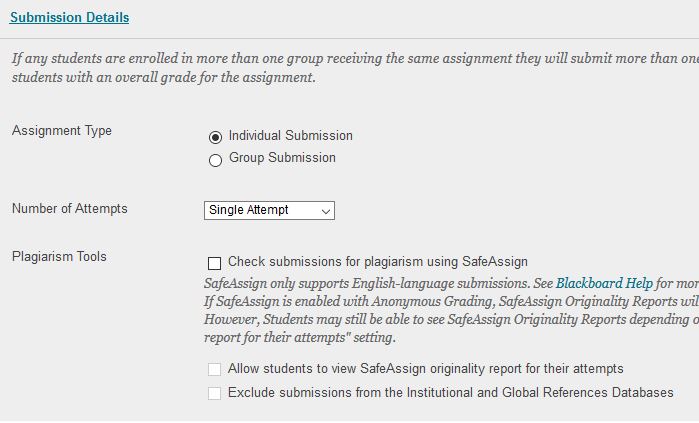
Under Submission Details, you can leave the default assignment type as individual submission, or change the assignment to a group submission.
Group submissions take advantage of the "Groups" tool in Blackboard -- you must have the students assigned to groups in Blackboard for this option to work. If the students are assigned a group project -- collaboratively writing a paper, say -- setting the assignment type to "Group" creates one submission space for each group. Any one student in the group can submit the assignment for all, and entering a score in that space scores for the whole group. For example, if Jane, Bob, and Anne are all in Group 1 on Blackboard, any one of the three can submit the assignment. In the Grade Center, you'll only have the the one submission to read and score for the whole group. Viewing the attempt for Jane, Bob, or Anne will get you to the same submission attempt.
The Number of Attempts indicates the number of times a student can submit the assignment. Allowing multiple attempts provides the opportunity for students to submit multiple drafts. It means less management on your end (because students can submit more than once there's no need to clear accidental submissions). If you allow multiple attempts, you should be clear in your instructions that only the most recent submission will be scored (or establish other appropriate expectations).
The Plagiarism Tool (called SafeAssign) compares student work to a variety of sources, including internet sources, a database of journal articles and books, and an institutional database of previous student submissions, then provides you with an "originality report" indicating potential matches to other sources. This originality report can be for the students to view or the instructor only. Select "Exclude submissions from the Institutional and Global References Database" if the students are submitting a draft assignment (lest their final submission be returned as entirely plagiarized from their own original submission).
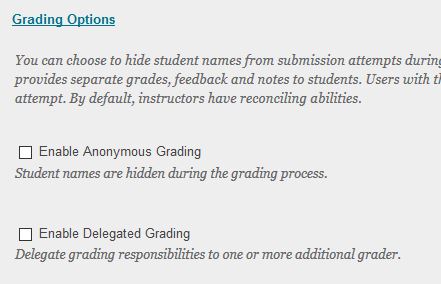
Under Grading Options, you can turn on anonymous grading if you wish. This hides identifying information from the grading process. The "Enable Delegated Grading" option lets you assign grading responsiblities in courses with multiple faculty or teaching assistants.
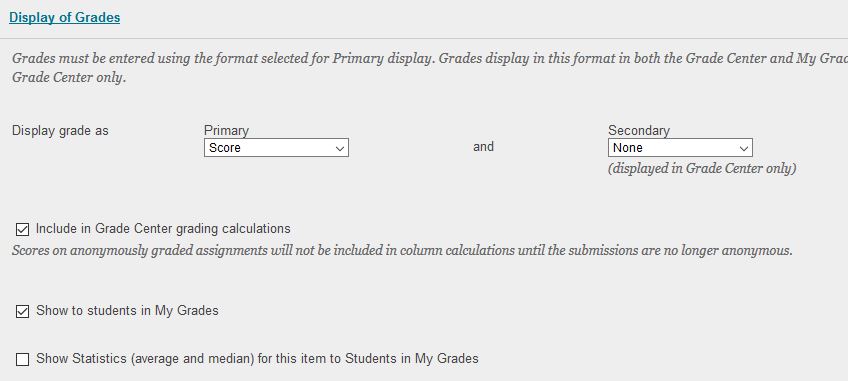
Under Display of Grades, you can change the primary and secondary score (this can also be done in the Grade Center) from the default. NOTE: The secondary display is visible only to faculty in the grade center, it is not visible to students. You may also decide this assignment is a practice, in which case you may wish to uncheck the “Include in grade center grading calculations” option, thus excluding it from the default "Total" column. Generally speaking, it’s a good idea to leave it checked as the default. You may also make the score unavailable to your students by unchecking the “show to students in my grades”. If you wish to show the statistics for the assignment to your students, check the third option.
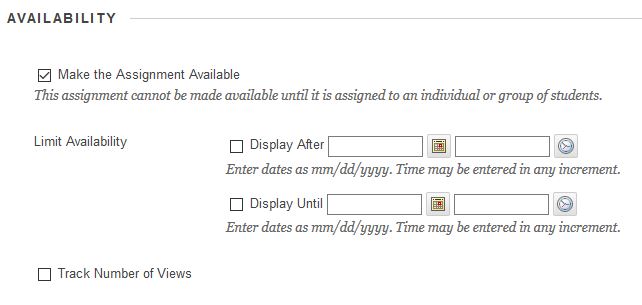
You may wish to limit when your students have access to the assignment. Maybe you are setting up your class for future weeks, or wish to grant them access to the submission space only during a specific time frame. To limit access, first check the appropriate "Display After" / "Display Until" boxes, then enter a date and time range manually or click on the calendar and/or clock icon to set the date and time. If you leave these fields blank, the assignment will be open until you turn it off manually. You may also track the number of views for this assignment by checking the track number of views option.
When you're finished, click the submit button.


