Filter:

Dental library (restricted access)
Microsoft Stream - Add a Permission to a Video
If you have uploaded a video to Stream and your students are reporting that they cannot view the video (they're seeing a "This may not be for you" message), you'll need to change the permissions on the video.
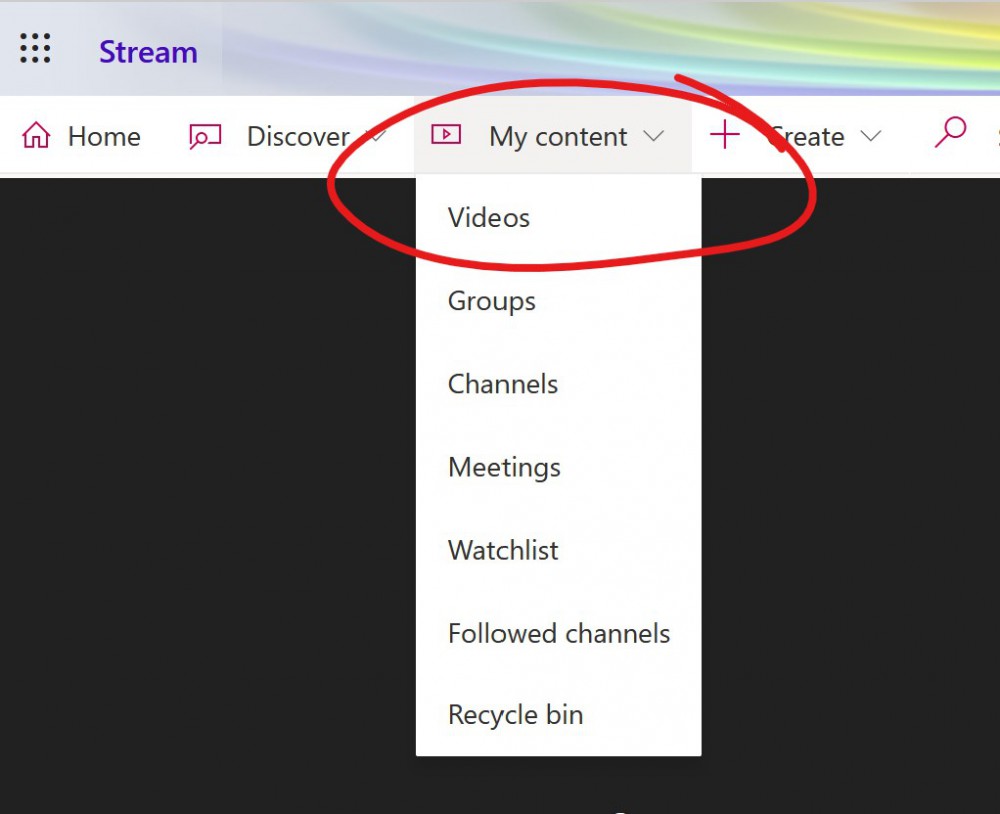
To do this in Stream we'll first need to locate the video. Click MY CONTENT and choose VIDEOS.
Locate the video in question in your videos list. Click the pencil-button -- when you mouse over the buttons, labels appear indicating what functions each will take you to; we want to choose "Update video details".

Look for PERMISSIONS on this page. Depending on your screen-width, it will either appear in the center of the page, or be a heading beneath the "Details" box. If it appears as a heading, click the heading to expand the box.
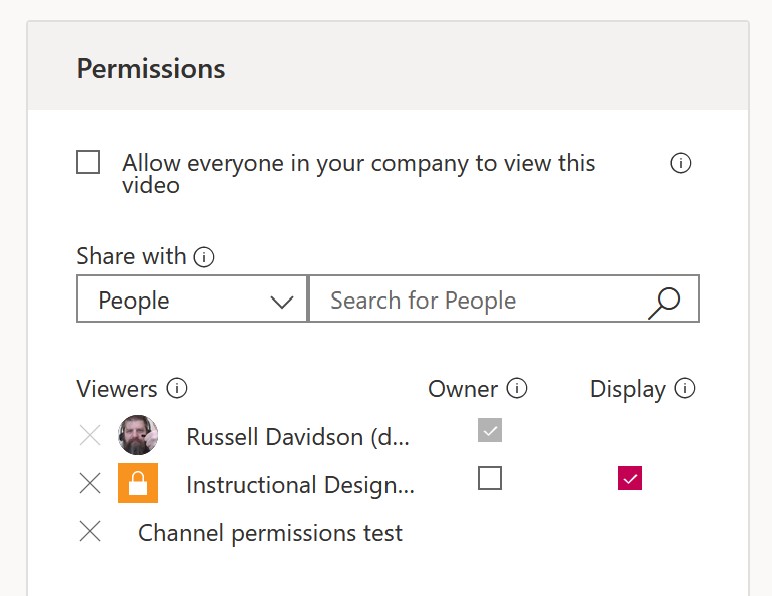
Now we just need to add the appropriate permissions. Check "Allow everyone in your company to view this video" if you want to make the video available to everyone at Detroit Mercy. This is the fastest and surest way to make your video available.
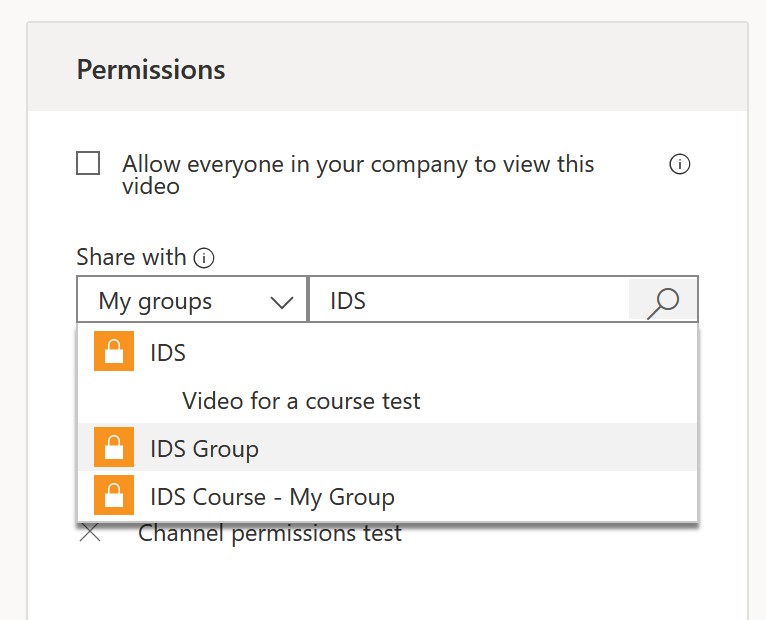
If you'd prefer to limit the availability, we recommend setting up a group (this link takes you to the instructions). If you've already done that, then under SHARE WITH you can select MY GROUPS from the drop-down list, then start typing the name of the group you created. If the list doesn't populate automatically, click the SEARCH button to search for the group name. When the full name appears, click it to add it to the groups list.
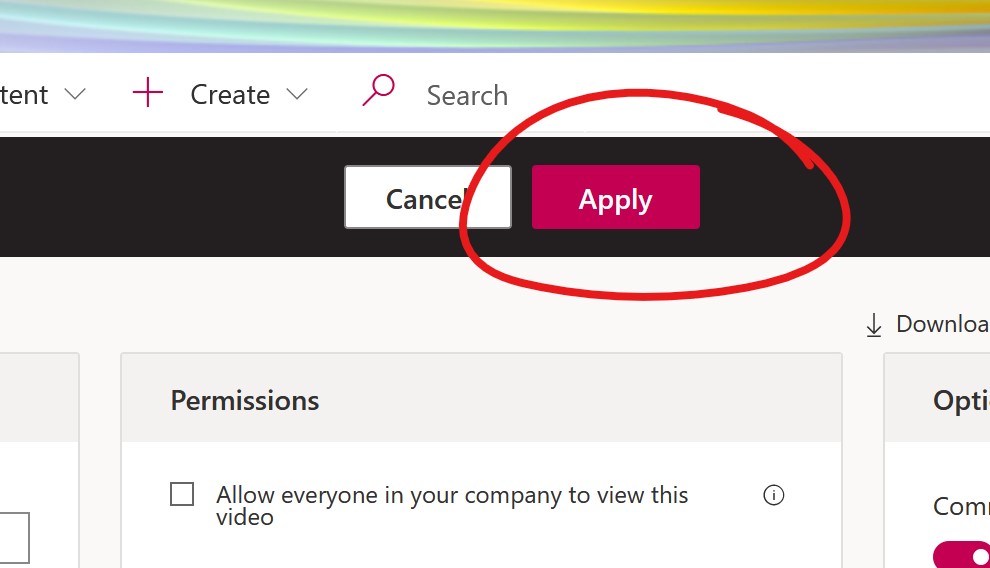
Then click APPLY at the TOP of the screen to save your changes.