Contact
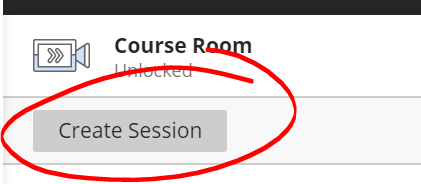
You can use Collaborate sessions to create separate spaces inside Collaborate for different uses. For example, you might create a Virtual Office session for holding virtual office hours, a Weekly Classroom session for scheduled weekly collaborative activities, and / or a Group Study room for students to use without your supervison. To create a Session, click the CREATE SESSION button.

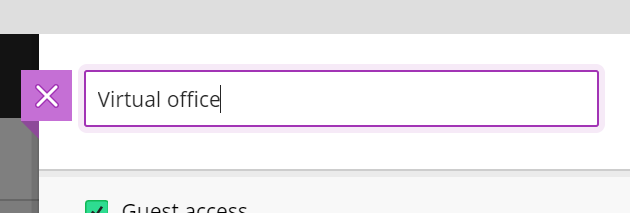
Each session needs a clear, descriptive name. Give your session an appropriate name.

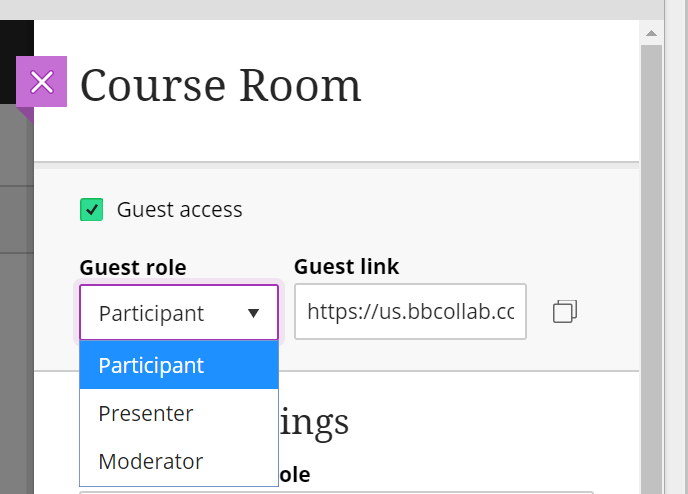
Next is guest access settings. Uncheck the box to prevent guest access. Under Guest role you can choose the starting role of an incoming guest user. In most cases, you'll want this set to match the default attendee role. We cover roles in more detail on the Room (session) settings walkthrough linked below.

Under Event Details, set a start date and time for your session.
To set up a open room that is always available
Useful for collaborative student study spaces. Set a start date and time, check the No end (open session) box.
To set up a regularly occuring room
Useful for scheduled events that repeat, like virtual office hours or weekly, faculty-led collaborative activities.
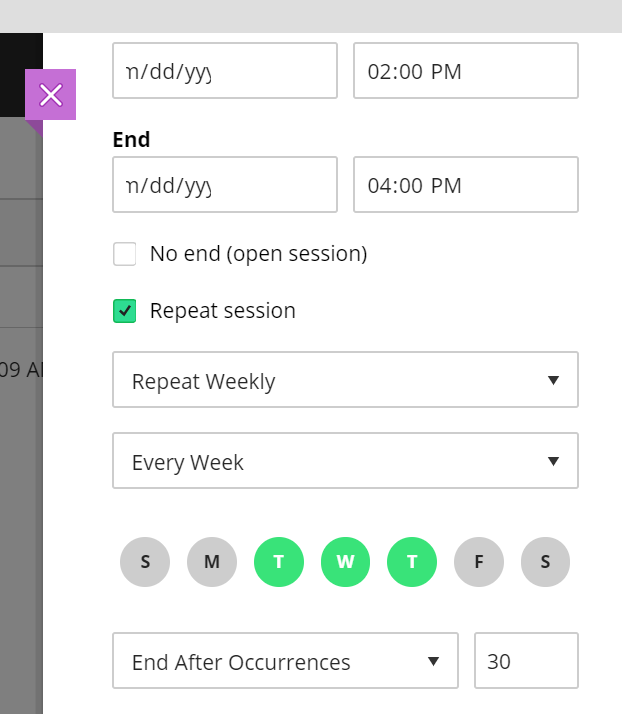
Enter start and end times for the repeating session. If your virtual office hours are from 2:00PM til 4:00PM Tuesdays and Thursdays, enter 2:00PM and 4:00PM in the appropriate boxes.
Check REPEAT SESSION.
In the Repeat Weekly pulldown list, you can choose to repeat daily or monthly if you wish. Next, choose the repeat schedule (e.g., repeat every every wk, every 2 wks, every 3 wks, etc). If you choose Weekly repetition, you can also choose which day (or days) of the week you want to repeat on. For a Tuesday and Thursday repetition, click T and T to highlight those days.
If you did not choose to create an open ended session, the End after pulldown lets you select when you want the session to close. You can set it to close after a number of occurances (30 sessions, for example), or on a specific date.

The Early entry option sets the amount of time the room is accessible before the session begins. Use this option to let your students get into the session early and make sure they are all set up and ready to go before the session's actual start time.

If the purpose of the room isn't self-evident, click the Provide a description link and type a description for the room. This may be particularly helpful for spaces like student group study rooms.

Finally, you'll want to review the session settings. Check out the session settings page linked below for an explanation of these options.
Once your session is all set up, click SAVE to save your changes. You can edit these settings at any time by clicking the ellipsis button to the right of the session name.

Permalink Last updated 09/13/2017 by R. Davidson


