Research guides
Advanced adaptive release lets you create multiple rules, each of which can include membership, date, and / or grade critera. This is useful, for example, if you want to make an assignment available for different groups (or individuals) at different times.
To get started, create the item (or assignment, or test, what-have-you) you wish to set an adaptive release for. Make sure you make the item available, otherwise the adaptive release rules will be ignored. Then click the options button and choose Adaptive Release: Advanced.
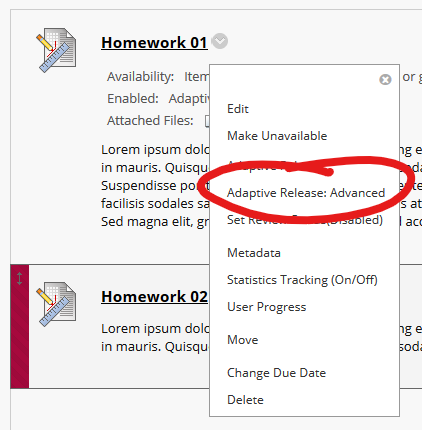
Note: You can add adaptive release to anything you put in a Content Area -- items, files, folders, tests, assignments, links. In this walkthrough we'll use "item" to refer to the thing you're releasing adaptively.
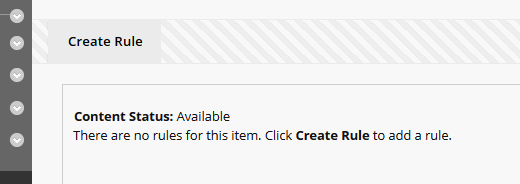
Click the CREATE RULE button in the upper left to create a new rule set.
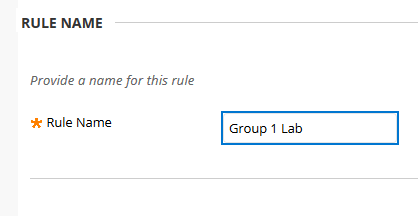
You can name the rule however you like. Providing a descriptive name can help you find the proper rule to make changes to, should it be necessary in the future.
Now you can add one or more criteria.
Membership
Use the Browse button to add one or more users or, if you have groups set up for the course, you can select one or more groups.
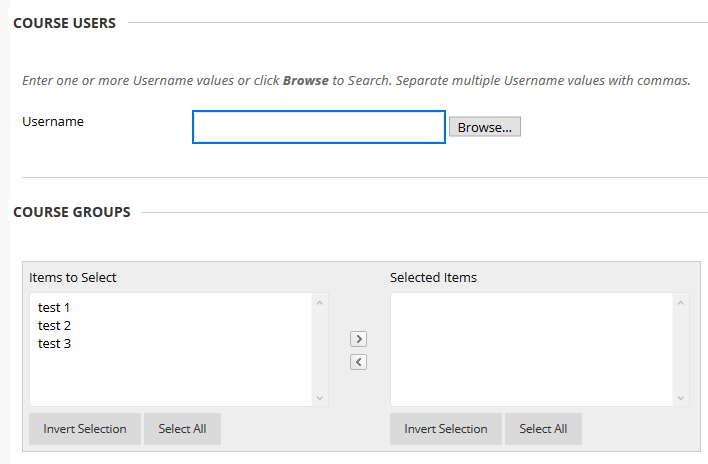
If you set only membership criteria, then the item will be available to anyone included.
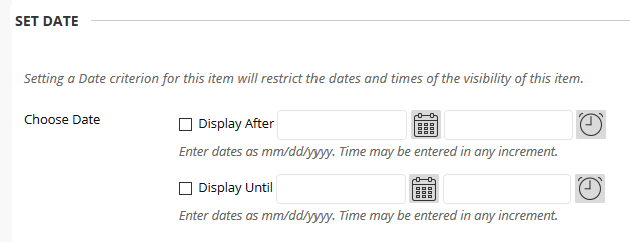
Date
Use the date criteria to set Display After and / or Display Until dates. If you've set membership criteria, the item will be available to folks in the membership criteria on these dates.
Grade
Use the grade page to make the item available based on a student's score in a certain column in the Grade center. First choose the column from the pulldown-list, then choose an appropriate condition -- user has an attempt, or user has a score that falls into a certain range.
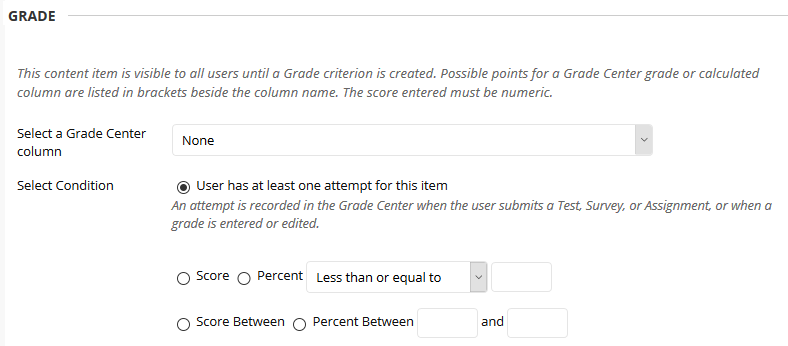
If you've set other criteria (membership or date), the rules will stack, so only users with, say score and membership, will have access to the item.
One you've got a rule set up, you can click OK on the rule page, then create more rules as necessary.
Permalink Last updated 01/02/2020 by R. Davidson


