Research guides
It's easy to set a Blackboard item or assessment so it becomes available at a certain time. There may be times, however, when you want to make an item available only to certain students, or after a student has attempted (or successfully completed) an assessment, or perhaps just once a student has acknowledged reciept. For this, Blackboard presents us with "Adaptive Release".
Before setting adaptive release requirements, make sure the item you want to set adaptive release on is otherwise available to students.
Next, click the OPTIONS button for the item you wish to release conditionally.

Now choose ADAPTIVE RELEASE. The ADAPTIVE RELEASE ADVANCED option is for applying more than one adaptive release rule at once. We're going to focus on the basic adaptive release functionality in this walkthrough.
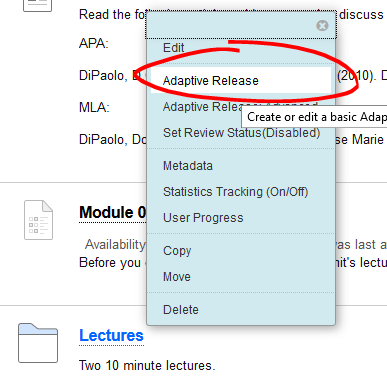
There are four types of adaptive release rules you can apply: Date, Membership, Grade, and Review.
Date release
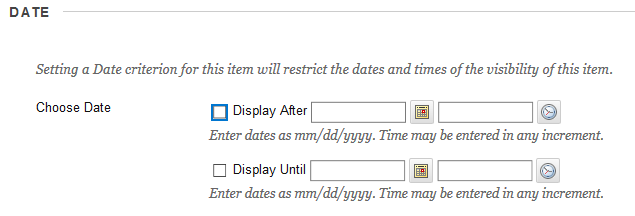
Date release is fairly self-explanatory. As with setting release dates in the item options, setting Display After / Display Until dates as an adaptive release rule sets a window of availability for an item. Why use an adaptive release rule when I can set the date on an item itself, you ask? A possible reason is when copying content from one course to another you can choose not to copy the adaptive release rules, meaning that all content would be available from the start. Alternatively, if you're using a lot of adaptive release rules in a course, you may want to centralize your release rules under adaptive release to make things less confusing.
Membership release
Membership release lets you make an item available to individual students or to groups of students. This can be particularly helpful if you have student groups working on different projects and want to present students with only the content relevant to their particular project.
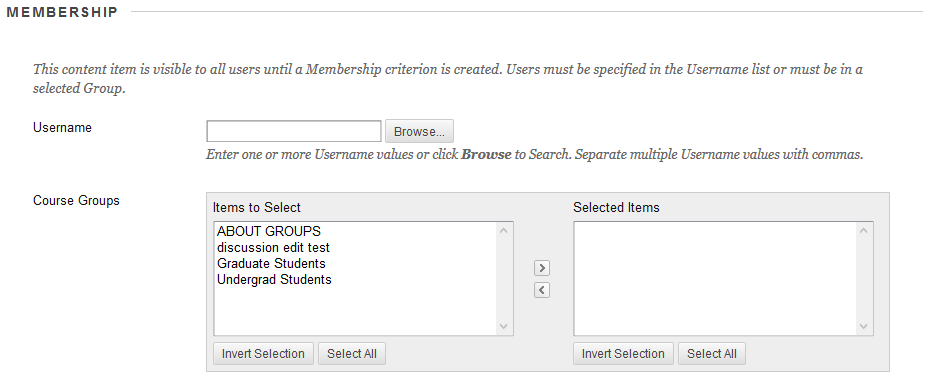
To make the item available to a specific user (or set of users), enter their usernames in the Username field, or use the BROWSE button to find the students by name. If you have groups set up in the course, you can make the content available to students who are members of a specific group (or set of groups, or only students who are in any group) by selecting the group in the ITEMS TO SELECT box and clicking the right-pointing arrow to move them into the SELECTED ITEMS box.
Grade release
Possibly the most asked about type of adaptive release is grade release. Use this option to set an item to become available after a student has completed an attempt (or received a score) on a graded item. For example, if you want to hold an item back until a student has completed a post test, select the post-test column from the "Select a Grade Center column" pulldown list.
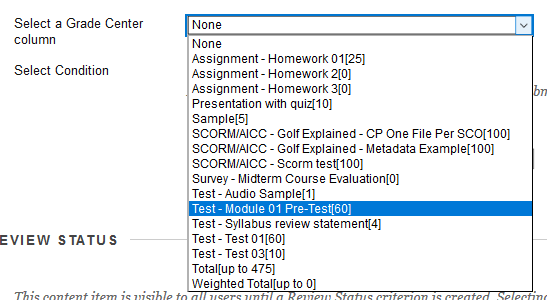
If you want the item to become available after the student has simply completed an attempt (i.e., you don't care about their score), then leave the "User has at least one attempt..." condition selected.

You can, however, choose to require your students hit a score or percent milestone before content is made available select the appropraite radio button, then enter the milestone you want your students to achieve in order to see the adaptive release content (say, they have to get an 80% or better on the reading quiz before the lecture becomes available).

Review Status release
Review status release puts a "Mark Reviewed" checkbox on an item you select (note: this button is only visible to students or instructors who are in student preview mode). When students check that box, the item you've set for adaptive release becomes available.
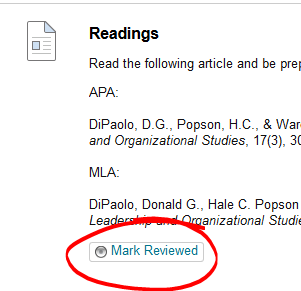
To set up this review method, click the browse button under the Review Status heading.

A window will pop up listing all the items in your course that can have the "Mark Reviewed" button attached. Click the item you want students to have to mark reviewed.
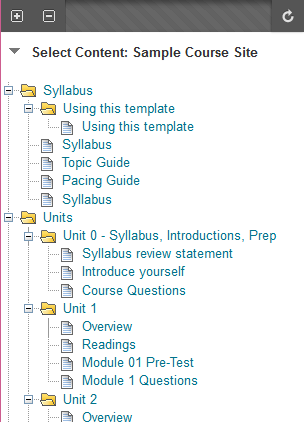
Once you've got your adaptive release options set, click SUBMIT to save your changes.
Permalink Last updated 11/15/2017 by R. Davidson


