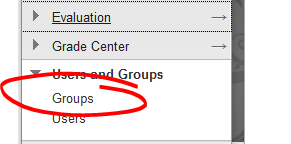
To get started creating a group in Blackboard, click Users and Groups, then choose Groups.
When creating groups, you'll need to decide whether you're creating just one group at a time (Single Group) or whether you're creating a number of groups at once (Group Set).
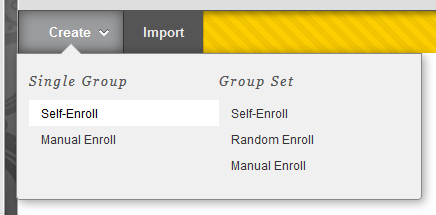
Group Set is the most common type folks use (if you're creating four project groups, why do them individually when you can create them all at once?), so we'll explore that here. Also, the Single Group options are almost exactly the same as the Group Set options -- they're just applied to a single group.
Under Group Set you have three options:
- Self-Enroll -- Students have the option to add themselves to a group.
- Random Enroll -- Blackboard adds students to the groups automatically.
- Manual Enroll -- You select which students go into which groups.
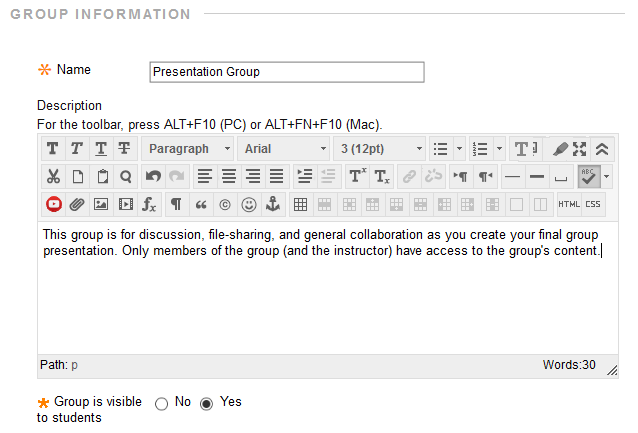
Provide a name and description for your group. When Blackboard generates the group set, the name you give will have a number added to its end by default -- so if you use "Presentation Group" for your name and you generate 3 groups you'll end up with Presentation Group 1, Presentation Group 2, and Presentation Group 3. You will also have the option to customize group names later, if you'd prefer more individualized group names (Red Team, Blue Team, etc).
You should also choose whether the group is visible to students or not.
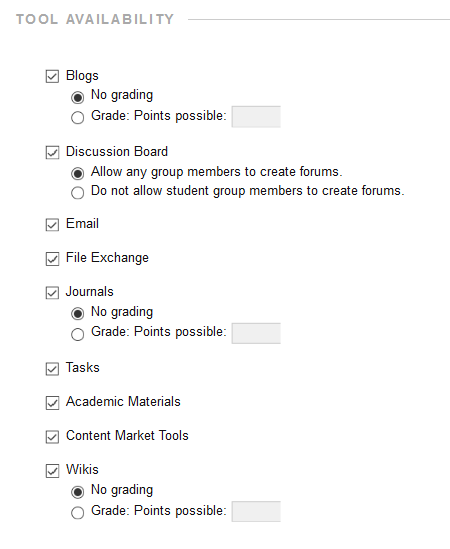
Next we choose which tools we want the students to have access to inside their group and whether, when available, you want to include grading.
Blogs, Discussion, Wikis, and Journals all work as you would expect if you're familiar with them at the course level.
Email allows the group members to email each other from within the group.
File Exchange lets the students upload files to and download files from their group site. Files added to the exchange cannot be deleted or edited by the students.
Tasks lets students create and assign task lists.
Academic Materials and Content Market Tools allow access to add on content from Blackboard partners. Contact IDS for more information about these options.
Allow Personalization lets the group members edit which modules are available in the course, and lets them change the group color scheme.

Group Set Options
If you're creating Self-Enroll or Manual Enroll groups, you'll find the box for entering the number of groups you wish to create here. If you're randomly enrolling groups, this option appears later (under membership).
For any of the group types, you can also use the "Create smart view for each group in set" option to create a toggle in your Grade Center that will quickly limit the view to just members of a group in this set, making it easier to grade group work and track group grade progress.

Membership -- Random Enroll
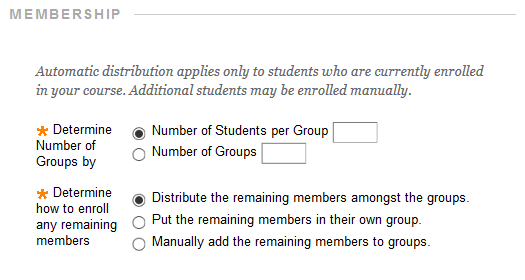
If you've chosen the random enrollment option, first you must choose whether to generate the number of groups based on students per group or a flat number of groups. Select the appropriate option and indicate the number.
Next, you can choose how remaining members are handled, once your students have been evenly divided. They can be distributed amongst the groups randomly, put into their own (smaller) group, or you can choose how to select which users go into which group yourself.
Membership -- Manual Enroll
If you've chosen manual enrollment, you'll need to submit the group set's info before adding members. Once you submit, you'll get the Edit Group Set Enrollments page.
The first option on this page is whether you want to filter member availability. With this option checked, adding a student to one group will remove them from the list of selectable names in the others in that set, preventing you from accidentally putting the same student into two groups.
Click the RANDOMIZE ENROLLMENTS button if you want to randomize the enrollments (essentially this gets you the same result as creating a Random Enroll group set).

The editable NAME field lets you customize the default set names, if you'd like.
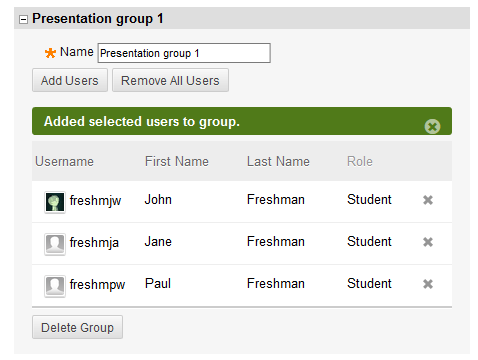
To add the users individually, click the ADD USERS button. This will open an add-users window. Check the names of the users you wish to add, then click SUBMIT. With the Hide Members option selected, those users you've added will be removed from the selectable list when you click the ADD USERS button for the second group.
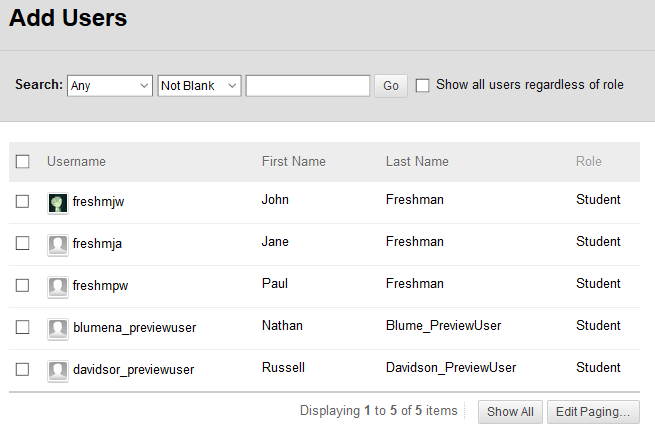
To remove users you've added, click the X button to the right of their name and role.
Membership -- Self-Enroll
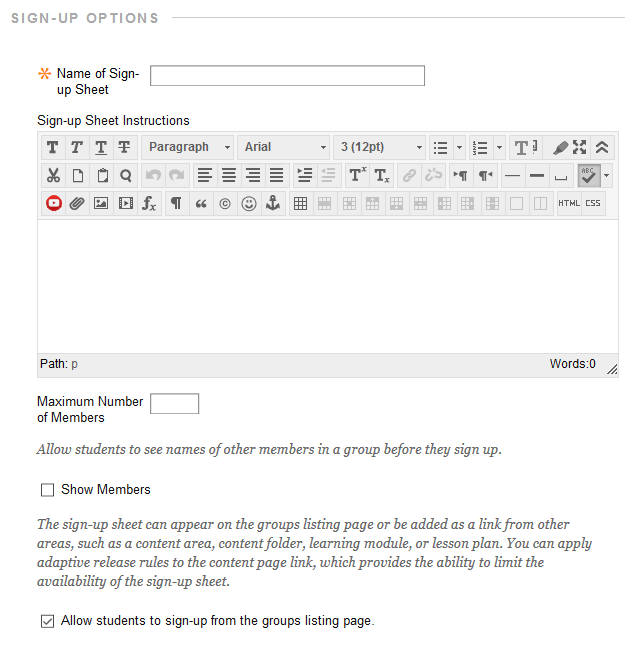
If you've chosen the self-enroll type, you'll have options for creating a sign-up sheet. You'll be prompted to provide a name for the sheet. The Instructions space is both for laying out the sign-up rules and for letting folks know what they'll be doing within the group.
You can indicate the maximum number of members in the group, and you can also decide whether students can see the other members of the group as they sign up.
Finally, you can decide whether the students can access the sign up sheet from the GROUPS page (accessible via TOOLS / GROUPS) or only via an add to a content area.
Permalink Last updated 09/05/2018 by R. Davidson


